Learn How to Touch-Type with Your Left Hand Using Keyboardy
Typing with your left hand takes practice, just like learning regular touch typing. With time and repetition, your fingers will naturally memorize key positions. The biggest advantage of touch typing is that you won’t need to look down at the keyboard to locate keys, allowing you to type faster and more accurately while keeping your focus on your work.
📝 Note: Although this guide uses English and a QWERTY 60% (compact) keyboard layout to demonstrate one hand touch typing, both Keyboardy and the techniques in this guide can be applied to any language and any keyboard layout.
In this guide, you'll learn step by step how to:
- ✅ Position your hand correctly
- ✅ Move your fingers efficiently
- ✅ Use Keyboardy’s Reflecting Functionality to type effortlessly with just your left hand.
Let’s get started! 🚀
1️⃣ Hand Placement: Positioning Your Left Hand
Proper finger placement is key to typing quickly and efficiently.
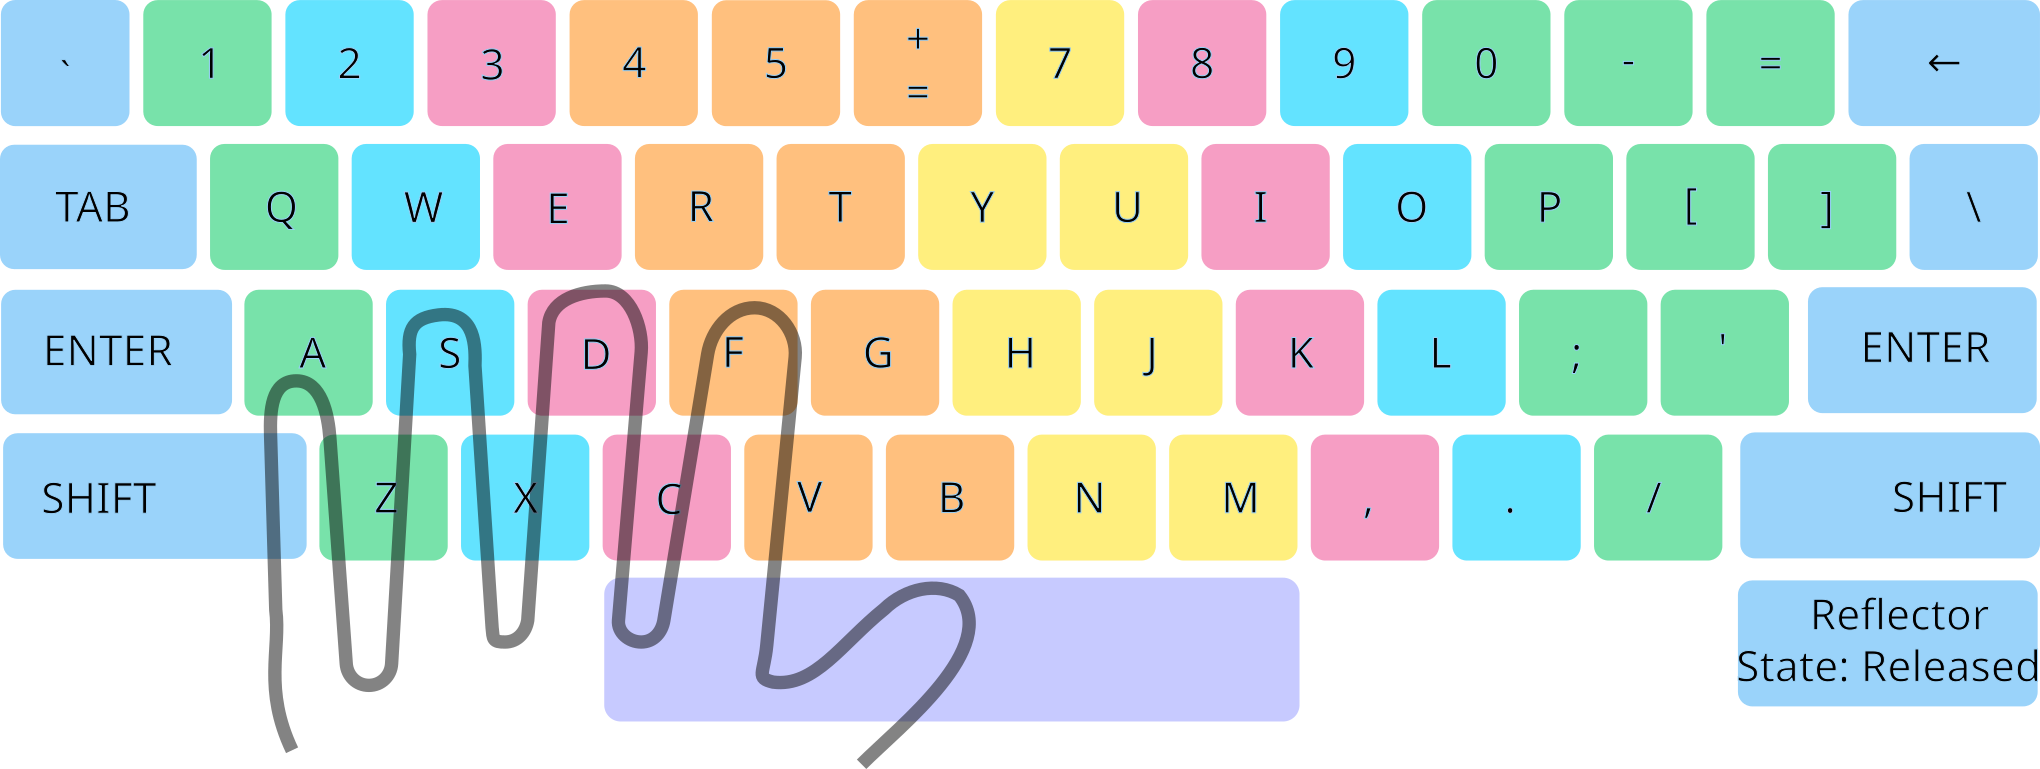
- 🔹 Find the F key: Close your eyes and locate the bump on the F key with your left index finger. This is your starting position.
-
🔹 Place your fingers on the home row:
- Index finger → F
- Middle finger → D
- Ring finger → S
- Pinky finger → A
- 🔹 Thumb Placement: Rest your thumb on the Space Bar.
- 🔹 Return to this position after each keystroke.
2️⃣ Moving Your Fingers to Reach Keys
Now that your hand is stationary on the home row (A-S-D-F), your fingers will move up and down to reach other keys, while your hand remains in place.

Finger-to-Key Mapping
- 🔹 Pinky: A, Q, Z, Shift, Tab, Caps Lock → Enter
- 🔹 Ring Finger: S, W, X, 2, `, 1
- 🔹 Middle Finger: D, E, C, 3
- 🔹 Index Finger: F, R, V, T, G, B, 4, 5, 6 → =
- 🔹 Thumb: Space Bar
💡 Tip: Your hand should remain stationary, only your fingers should move!
3️⃣ Using the Reflector Key to Reach the Right Side of the Keyboard
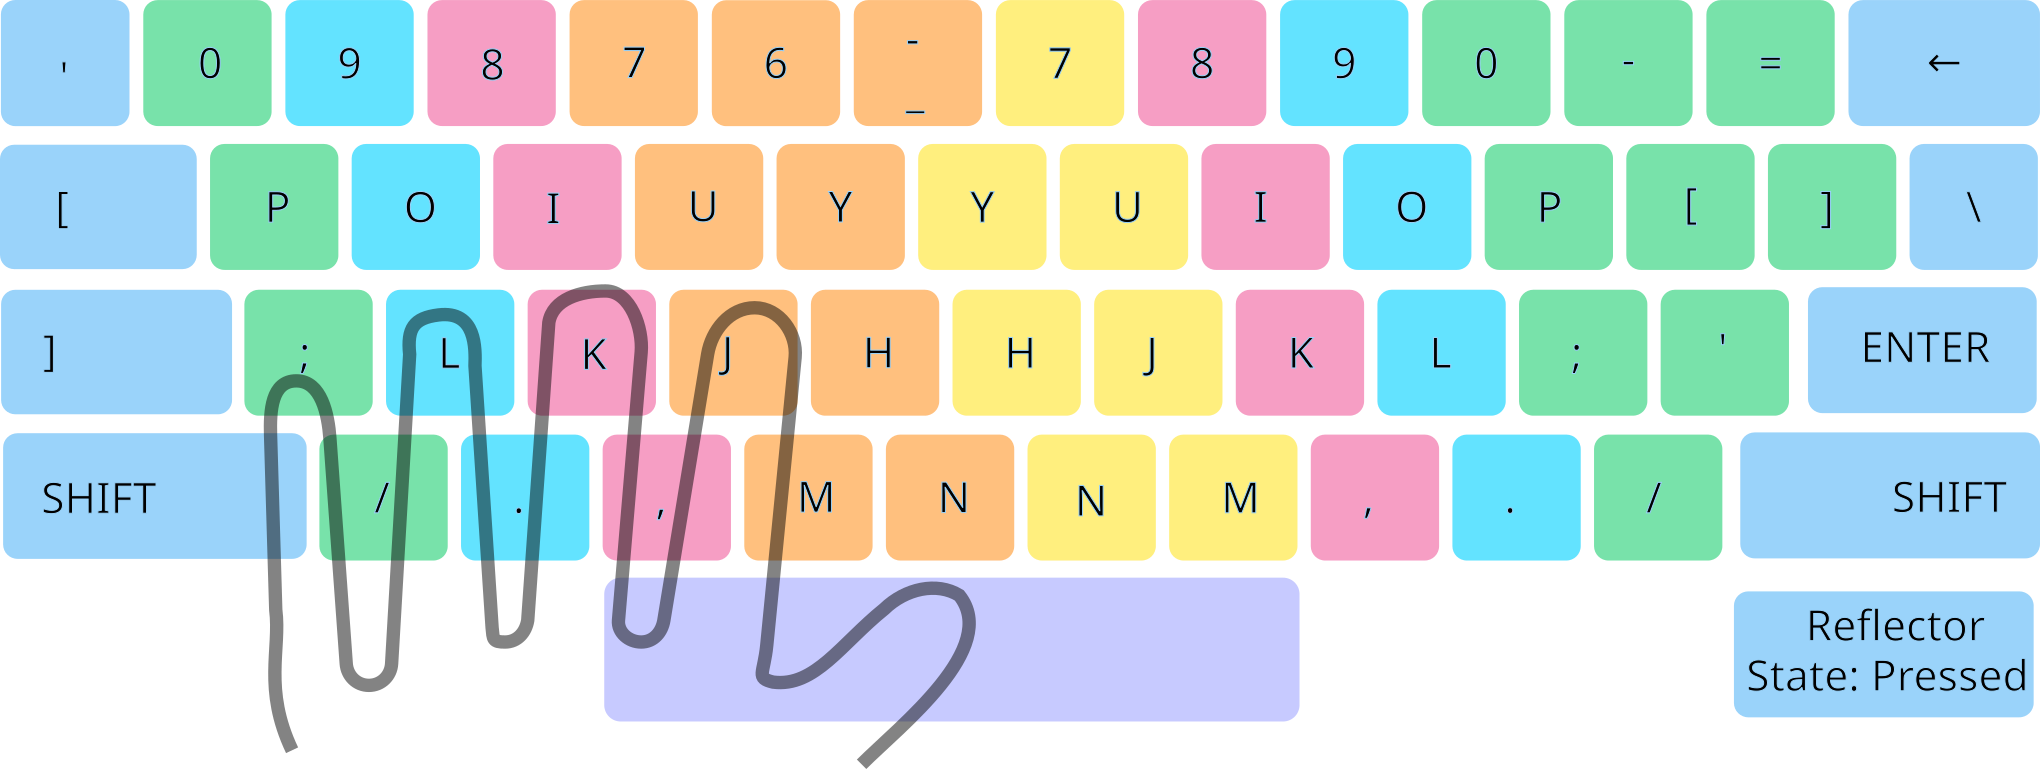
Whether the reflector key in the map you are using is Space Bar, Numpad Minus, or something else, hold it down to access the right-side keys without moving your hand, press and hold the Reflector key. This mirrors the right side of the keyboard onto the left, allowing you to type all keys effortlessly.

Finger-to-Key Mapping (With Reflector Pressed)
- 🔹 Pinky: ;, ', P, [, ], 0, /, Shift
- 🔹 Ring Finger: L, O, ., 9
- 🔹 Middle Finger: K, I, 8, ,
- 🔹 Index Finger: J, U, 7, M, H, Y, - (6 + Reflector), N
- 🔹 Thumb: Space Bar
💡 Tip: Hold the Reflector key whenever you need to type right-side keys, then release it to return to the normal layout.
4️⃣ Practicing & Improving
- ✅ Avoid looking at the keyboard. Train your fingers to find keys using muscle memory.
- ✅ Practice typing simple words first, then move on to longer sentences.
- ✅ Use typing exercises to improve speed and accuracy over time. While Keyboardy doesn't have a way for you to train and practice typing one handed, we recommend the following tools:
-
TypingClub: offers gamified lessons that are both fun and highly effective for improving typing skills.
Tip: Avoid following their one-handed lesson plans, as they teach users to move their hand left and right to reach keys. Instead, follow the regular typing lessons and use the Reflector key to access keys from the opposite side. - Monkeytype: is a minimalistic and customizable typing test you can use to time your typing and practice.
-
TypingClub: offers gamified lessons that are both fun and highly effective for improving typing skills.
5️⃣ Discover Useful Mappings
Some maps has additional mappings to further keep your hand stationary- F3 acts as Backspace that deletes a letter, this way your left hand don't have to travel to the right side to delete a letter.
- F2 acts as Delete that deletes a forward letter.
- F4 acts as Backspace + Ctrl that deletes a word
- F1 acts as Delete + Ctrl that deletes a forward word
- H, U, K, J keys acts as Arrow Keys: ⬅️, ⬆️, ➡️, ⬇️ respectively. This way your left hand middle finger can be anchored at the J bump and the index and ring can be used to move the cursor around.
- If you are using your right hand as auxiliary, keys can be mapped to Ctrl + C and Ctrl + V so that you can copy & paste with your auxiliary while your left is using the mouse
👍 Useful Links
🚀 Remember: One-handed touch typing takes practice, just like regular typing. Keep going—you’ve got this! 💪

